# 查看conda虚拟环境列表
conda env list
# 删除虚拟环境
conda remove -n my_first_env --all
# 创建虚拟环境
conda create --name my_first_env python=3.6
# 进入虚拟环境
conda activate my_first_env
分类: python
Python获取硬件信息(硬盘序列号,CPU序列号)
pip install wmi
pip install pywin32
import wmi
c = wmi.WMI()
# # 硬盘序列号
for physical_disk in c.Win32_DiskDrive():
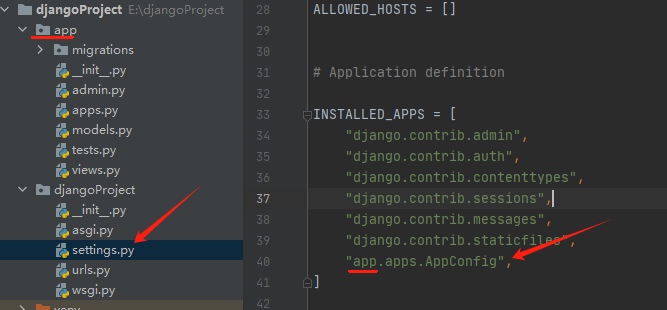
print(physical_disk.SerialNumber)
# CPU序列号
for cpu in c.Win32_Processor():
print(cpu.ProcessorId.strip())
# 主板序列号
for board_id in c.Win32_BaseBoard():
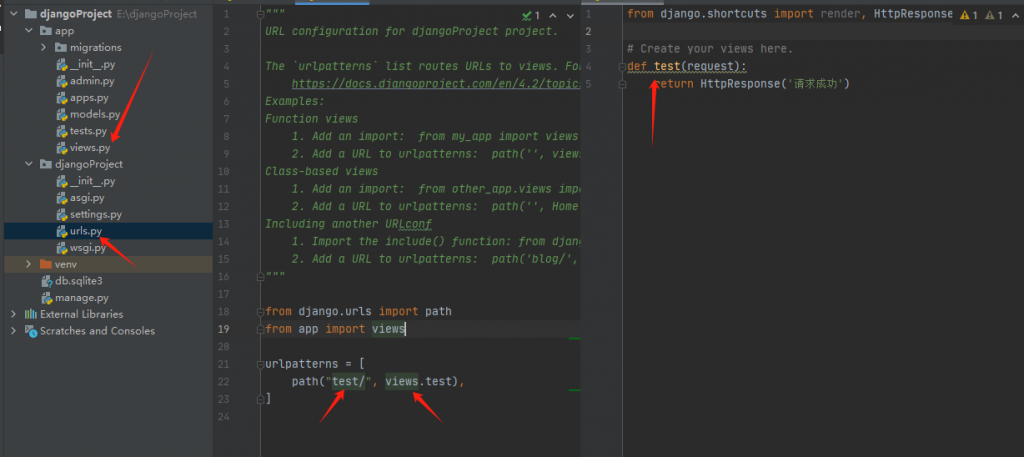
print(board_id.SerialNumber)
# mac地址
for mac in c.Win32_NetworkAdapter():
print(mac.MACAddress)
# bios序列号
for bios_id in c.Win32_BIOS():
print(bios_id.SerialNumber.strip())Python操作Redis
python中删除某个元素的3种方法
1.remove: 删除单个元素,删除首个符合条件的元素,按值删除
举例说明:
>>> str=[1,2,3,4,5,2,6]
>>> str.remove(2)
>>> str
[1, 3, 4, 5, 2, 6]

2.pop:  删除单个或多个元素,按位删除(根据索引删除)
>>> str=[0,1,2,3,4,5,6]
>>> str.pop(1)   #pop删除时会返回被删除的元素
1
>>> str
[0, 2, 3, 4, 5, 6]
>>> str2=['abc','bcd','dce']
>>> str2.pop(2)
'dce'
>>> str2
['abc', 'bcd']

3.del:它是根据索引(元素所在位置)来删除
举例说明:
>>> str=[1,2,3,4,5,2,6]
>>> del str[1]
>>> str
[1, 3, 4, 5, 2, 6]
>>> str2=['abc','bcd','dce']
>>> del str2[1]
>>> str2
['abc', 'dce']

除此之外,del还可以删除指定范围内的值。
>>> str=[0,1,2,3,4,5,6]
>>> del str[2:4]  #删除从第2个元素开始,到第4个为止的元素(但是不包括尾部元素)
>>> str
[0, 1, 4, 5, 6]

del 也可以删除整个数据对象(列表、集合等)
>>> str=[0,1,2,3,4,5,6]
>>> del str
>>> str         #删除后,找不到对象

Traceback (most recent call last):
  File "<pyshell#27>", line 1, in <module>
    str
NameError: name 'str' is not defined

注意:del是删除引用(变量)而不是删除对象(数据),对象由自动垃圾回收机制(GC)删除。

补充: 删除元素的变相方法
s1=(1,2,3,4,5,6)
s2=(2,3,5)
s3=[]
for i in s1:
if i not in s2:
    s3.append(i)
print 's1-1:',s1
s1=s3
print 's2:',s2
print 's3:',s3
print 's1-2:',s1Python 时间格式化
# strftime()方法语法:
time.strftime(format[, t])
# 参数
# format -- 格式字符串。
# t -- 可选的参数t是一个struct_time对象。
"""
python中时间日期格式化符号:

%y 两位数的年份表示(00-99)
%Y 四位数的年份表示(000-9999)
%m 月份(01-12)
%d 月内中的一天(0-31)
%H 24小时制小时数(0-23)
%I 12小时制小时数(01-12)
%M 分钟数(00=59)
%S 秒(00-59)
%a 本地简化星期名称
%A 本地完整星期名称
%b 本地简化的月份名称
%B 本地完整的月份名称
%c 本地相应的日期表示和时间表示
%j 年内的一天(001-366)
%p 本地A.M.或P.M.的等价符
%U 一年中的星期数(00-53)星期天为星期的开始
%w 星期(0-6),星期天为星期的开始
%W 一年中的星期数(00-53)星期一为星期的开始
%x 本地相应的日期表示
%X 本地相应的时间表示
%Z 当前时区的名称
%% %号本身
"""
python中把’\xe5\xb7\xa5\’转成汉字格式
解决方法:

在字符串后面加上.decode("utf-8"),问题解决

如:res.content.decode("utf-8")Python函数
# 列表
# 查找元素在列表中位置
p=list.index(value) # list为列表的名字 value为查找的值 p为value在list的位置

# Python中bytes与字符串的相互转化
# bytes转字符串方式一
b=b'\xe9\x80\x86\xe7\x81\xab'
string=str(b,'utf-8')
print(string)

# bytes转字符串方式二
b=b'\xe9\x80\x86\xe7\x81\xab'
string=b.decode() # 第一参数默认utf8,第二参数默认strict
print(string)

# bytes转字符串方式三
b=b'\xe9\x80\x86\xe7\x81haha\xab'
string=b.decode('utf-8','ignore') # 忽略非法字符,用strict会抛出异常
print(string)

# bytes转字符串方式四
b=b'\xe9\x80\x86\xe7\x81haha\xab'
string=b.decode('utf-8','replace') # 用?取代非法字符
print(string)

# 字符串转bytes方式一
str1='逆火'
b=bytes(str1, encoding='utf-8')
print(b)

# 字符串转bytes方式二
b=str1.encode('utf-8')
print(b)

# python3 字典、列表、数组和字符串之间的相互转化
# 字典
dict_1 = {'1': 'a', '2': 'b', '3': 'c'}
print(dict_1)  # 打印字典
print(type(dict_1))  # 打印新赋值的字典的类型

print(str(dict_1), end='字符串\n')  # 把字典转化成字符串后打印

print(tuple(dict_1), end='元组\n')  # 把字典转化为元组后打印

print(list(dict_1), end='列表\n')  # 把字典转化为列表后打印

# 元组
tuple_1 = (1, 2, 3, 4, 5)
print(tuple_1)  # 打印元组
print(type(tuple_1))  # 打印新赋值的元祖的类型

print(str(tuple_1), end='字符串\n')  # 把元组转化成字符串后打印

print(list(tuple_1), end='列表\n')  # 把元组转化为列表后打印

# 元组不可转化为字典

#列表
list_1 = [1, 2, 3, 4, 5]
print(list_1)  # 打印列表
print(type(list_1))  # 打印新赋值的列表的类型

print(str(list_1), end='字符串\n')  # 把列表转化成字符串后打印

print(tuple(list_1), end='元组\n')  # 把列表转化为元组后打印

#字符串
string_1 = '(1, 2, 3, 4, 5)'
print(string_1)  # 打印字符串
print(type(string_1))  # 打印新赋值的字符串

print(tuple(eval(string_1)), end='元组\n')  # 把字符串转化成元组后输出

print(list(eval(string_1)), end='列表\n')  # 把字符串转化成列表后输出

# 只有特殊字符串才能转化为字典
string_2 = '{"name":"tom","age":6}'
print(string_2)  # 打印新赋值的字符串
print(type(string_2))  # 打印新赋值的字符串的类型

print(eval(string_2), end='字典\n')  # 把字符串转化为字典后打印
python获得在线视频时长
# coding:utf-8

import struct
import requests

class Mp4info:
    def __init__(self, file):
        self.file = file
        self.seek = 0
        self.duration = 0
        self.s = requests.session()
        self.timeout = 6
        self.s.headers = {
            'Connection': 'keep-alive',
            'Accept': 'text/html,application/xhtml+xml,application/xml;q=0.9,image/webp,image/apng,*/*;q=0.8',
            'Accept-Encoding': 'gzip, deflate',
            'Accept-Language': 'zh-CN,zh;q=0.9,en-US;q=0.8,en;q=0.7',
            'User-Agent': 'Mozilla/5.0 (Macintosh; Intel Mac OS X 10_13_4) AppleWebKit/537.36 (KHTML, like Gecko) Chrome/66.0.3359.139 Safari/537.36'
        }

    # 设置请求头  set request header
    # 传入的seek表示代表需要跳过的字节数量  use seek to skip initial data
    # 在这里进行判断是为了后续获取视频的宽高信息预留的  the condition here is for reserving space for getting the media data
    def _set_headers(self, seek, type):
        if type in ['moov', 'duration']:
            self.s.headers['Range'] = 'bytes={}-{}'.format(seek, seek + 7)

    def _send_request(self):
        try:
            data = self.s.get(url=self.file, stream=True,
                              timeout=self.timeout).raw.read()
        except requests.Timeout:
            raise '连接超时:超过6秒(默认)服务器没有响应任何数据!'  # timeout 6 seconds, the server fails to respond and assumes there is no data
        return data

    def _find_moov_request(self):
        self._set_headers(self.seek, type='moov')
        data = self._send_request()
        size = int(struct.unpack('>I', data[:4])[0])
        flag = data[-4:].decode('ascii')
        return size, flag

    def _find_duration_request(self):
        # 4+4是moov的大小和标识,跳过20个字符,直接读到time_scale,duration  # 4+4 is the first 8 characters denoting charset, skip the next 20 to time_scale and duration
        self._set_headers(seek=self.seek+4+4+20, type='duration')
        data = self._send_request()
        time_scale = int(struct.unpack('>I', data[:4])[0])
        duration = int(struct.unpack('>I', data[-4:])[0])
        return time_scale, duration

    def get_duration(self):
        while True:
            size, flag = self._find_moov_request()
            if flag == 'moov':
                time_scale, duration = self._find_duration_request()
                self.duration = duration/time_scale
                return self.duration
            else:
                self.seek += size


if __name__ == '__main__':
    url = 'https://vd2.bdstatic.com/mda-mfqszq3mzd845q23/1080p/cae_h264/1624620686306577424/mda-mfqszq3mzd845q23.mp4?v_from_s=hkapp-haokan-tucheng&auth_key=1625478247-0-0-6baa0019344f9a31db76ddb4be3909e5&bcevod_channel=searchbox_feed&pd=1&pt=3&abtest=3000165_1'
    file = Mp4info(url)
    a = file.get_duration()
    print(a)
原文链接: https://blog.csdn.net/longjuanfengzc/article/details/103006691
Django 安装并创建空项目
1.pip安装Django
pip install django==2.2.4
2.创建一个名为 welcome 的Django项目
django-admin startproject welcome
3. 进入 welcome 文件夹 启动项目
cd welcome # 进入welcome文件夹
python manage.py runserver  # 启动服务器默认监听8000端口
python manage.py runserver 5000 # 启动服务器并手动指定监听5000端口
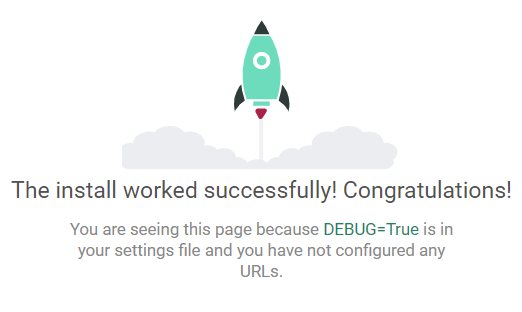
4.打开 127.0.0.1:8000 出现小火箭说明项目创建成功
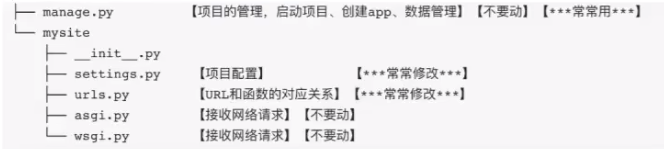
5.项目目录结构
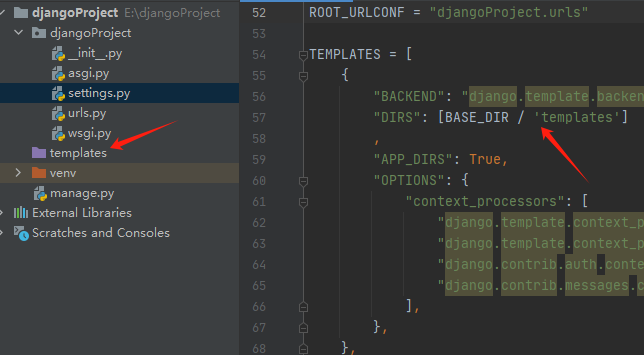
6.项目创建成功的准备工作
- 新建项目删除templates文件夹,并且修改setting这里的设置为[]
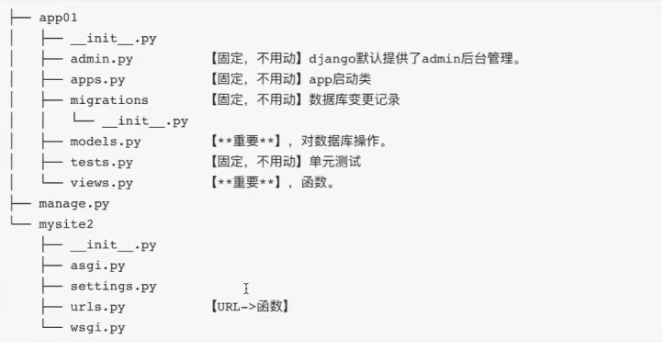
7.创建一个空的APP
 # 创建一个叫app的APP,下图中创建的是叫app01,不重要
 py manage.py startapp app
8.去settings注册这个app
9.启动django命令
py manage.py runserver 8000
10.编写一个普通的请求
python pip 安装
安装cv2 执行语句
pip install opencv-python
pip3 install opencv-python==4.4.0.42
安装PIL 执行语句
pip install pillow
安装 win32gui, win32ui
pip install -i https://pypi.doubanio.com/simple/ pywin32