解决方法:

在字符串后面加上.decode("utf-8"),问题解决

如:res.content.decode("utf-8")Python函数
# 列表
# 查找元素在列表中位置
p=list.index(value) # list为列表的名字 value为查找的值 p为value在list的位置

# Python中bytes与字符串的相互转化
# bytes转字符串方式一
b=b'\xe9\x80\x86\xe7\x81\xab'
string=str(b,'utf-8')
print(string)

# bytes转字符串方式二
b=b'\xe9\x80\x86\xe7\x81\xab'
string=b.decode() # 第一参数默认utf8,第二参数默认strict
print(string)

# bytes转字符串方式三
b=b'\xe9\x80\x86\xe7\x81haha\xab'
string=b.decode('utf-8','ignore') # 忽略非法字符,用strict会抛出异常
print(string)

# bytes转字符串方式四
b=b'\xe9\x80\x86\xe7\x81haha\xab'
string=b.decode('utf-8','replace') # 用?取代非法字符
print(string)

# 字符串转bytes方式一
str1='逆火'
b=bytes(str1, encoding='utf-8')
print(b)

# 字符串转bytes方式二
b=str1.encode('utf-8')
print(b)

# python3 字典、列表、数组和字符串之间的相互转化
# 字典
dict_1 = {'1': 'a', '2': 'b', '3': 'c'}
print(dict_1)  # 打印字典
print(type(dict_1))  # 打印新赋值的字典的类型

print(str(dict_1), end='字符串\n')  # 把字典转化成字符串后打印

print(tuple(dict_1), end='元组\n')  # 把字典转化为元组后打印

print(list(dict_1), end='列表\n')  # 把字典转化为列表后打印

# 元组
tuple_1 = (1, 2, 3, 4, 5)
print(tuple_1)  # 打印元组
print(type(tuple_1))  # 打印新赋值的元祖的类型

print(str(tuple_1), end='字符串\n')  # 把元组转化成字符串后打印

print(list(tuple_1), end='列表\n')  # 把元组转化为列表后打印

# 元组不可转化为字典

#列表
list_1 = [1, 2, 3, 4, 5]
print(list_1)  # 打印列表
print(type(list_1))  # 打印新赋值的列表的类型

print(str(list_1), end='字符串\n')  # 把列表转化成字符串后打印

print(tuple(list_1), end='元组\n')  # 把列表转化为元组后打印

#字符串
string_1 = '(1, 2, 3, 4, 5)'
print(string_1)  # 打印字符串
print(type(string_1))  # 打印新赋值的字符串

print(tuple(eval(string_1)), end='元组\n')  # 把字符串转化成元组后输出

print(list(eval(string_1)), end='列表\n')  # 把字符串转化成列表后输出

# 只有特殊字符串才能转化为字典
string_2 = '{"name":"tom","age":6}'
print(string_2)  # 打印新赋值的字符串
print(type(string_2))  # 打印新赋值的字符串的类型

print(eval(string_2), end='字典\n')  # 把字符串转化为字典后打印
JavaScript 正则表达式
/*是否带有小数*/
function    isDecimal(strValue )  {
   var  objRegExp= /^\d+\.\d+$/;
   return  objRegExp.test(strValue);
}

/*校验是否中文名称组成 */
function ischina(str) {
    var reg=/^[\u4E00-\u9FA5]{2,4}$/;   /*定义验证表达式*/
    return reg.test(str);     /*进行验证*/
}

/*校验是否全由8位数字组成 */
function isStudentNo(str) {
    var reg=/^[0-9]{8}$/;   /*定义验证表达式*/
    return reg.test(str);     /*进行验证*/
}

/*校验电话码格式 */
function isTelCode(str) {
    var reg= /^((0\d{2,3}-\d{7,8})|(1[3584]\d{9}))$/;
    return reg.test(str);
}

/*校验邮件地址是否合法 */
function IsEmail(str) {
    var reg=/^\w+@[a-zA-Z0-9]{2,10}(?:\.[a-z]{2,4}){1,3}$/;
    return reg.test(str);
}python获得在线视频时长
# coding:utf-8

import struct
import requests

class Mp4info:
    def __init__(self, file):
        self.file = file
        self.seek = 0
        self.duration = 0
        self.s = requests.session()
        self.timeout = 6
        self.s.headers = {
            'Connection': 'keep-alive',
            'Accept': 'text/html,application/xhtml+xml,application/xml;q=0.9,image/webp,image/apng,*/*;q=0.8',
            'Accept-Encoding': 'gzip, deflate',
            'Accept-Language': 'zh-CN,zh;q=0.9,en-US;q=0.8,en;q=0.7',
            'User-Agent': 'Mozilla/5.0 (Macintosh; Intel Mac OS X 10_13_4) AppleWebKit/537.36 (KHTML, like Gecko) Chrome/66.0.3359.139 Safari/537.36'
        }

    # 设置请求头  set request header
    # 传入的seek表示代表需要跳过的字节数量  use seek to skip initial data
    # 在这里进行判断是为了后续获取视频的宽高信息预留的  the condition here is for reserving space for getting the media data
    def _set_headers(self, seek, type):
        if type in ['moov', 'duration']:
            self.s.headers['Range'] = 'bytes={}-{}'.format(seek, seek + 7)

    def _send_request(self):
        try:
            data = self.s.get(url=self.file, stream=True,
                              timeout=self.timeout).raw.read()
        except requests.Timeout:
            raise '连接超时:超过6秒(默认)服务器没有响应任何数据!'  # timeout 6 seconds, the server fails to respond and assumes there is no data
        return data

    def _find_moov_request(self):
        self._set_headers(self.seek, type='moov')
        data = self._send_request()
        size = int(struct.unpack('>I', data[:4])[0])
        flag = data[-4:].decode('ascii')
        return size, flag

    def _find_duration_request(self):
        # 4+4是moov的大小和标识,跳过20个字符,直接读到time_scale,duration  # 4+4 is the first 8 characters denoting charset, skip the next 20 to time_scale and duration
        self._set_headers(seek=self.seek+4+4+20, type='duration')
        data = self._send_request()
        time_scale = int(struct.unpack('>I', data[:4])[0])
        duration = int(struct.unpack('>I', data[-4:])[0])
        return time_scale, duration

    def get_duration(self):
        while True:
            size, flag = self._find_moov_request()
            if flag == 'moov':
                time_scale, duration = self._find_duration_request()
                self.duration = duration/time_scale
                return self.duration
            else:
                self.seek += size


if __name__ == '__main__':
    url = 'https://vd2.bdstatic.com/mda-mfqszq3mzd845q23/1080p/cae_h264/1624620686306577424/mda-mfqszq3mzd845q23.mp4?v_from_s=hkapp-haokan-tucheng&auth_key=1625478247-0-0-6baa0019344f9a31db76ddb4be3909e5&bcevod_channel=searchbox_feed&pd=1&pt=3&abtest=3000165_1'
    file = Mp4info(url)
    a = file.get_duration()
    print(a)
原文链接: https://blog.csdn.net/longjuanfengzc/article/details/103006691
Django 安装并创建空项目
1.pip安装Django
pip install django==2.2.4
2.创建一个名为 welcome 的Django项目
django-admin startproject welcome
3. 进入 welcome 文件夹 启动项目
cd welcome # 进入welcome文件夹
python manage.py runserver  # 启动服务器默认监听8000端口
python manage.py runserver 5000 # 启动服务器并手动指定监听5000端口
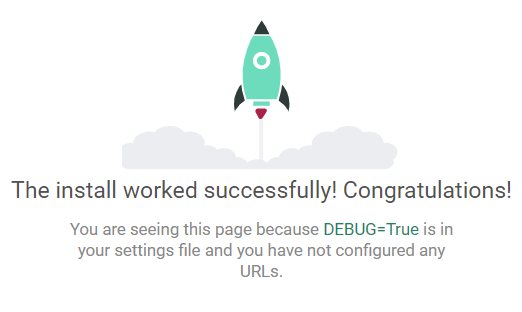
4.打开 127.0.0.1:8000 出现小火箭说明项目创建成功
5.项目目录结构
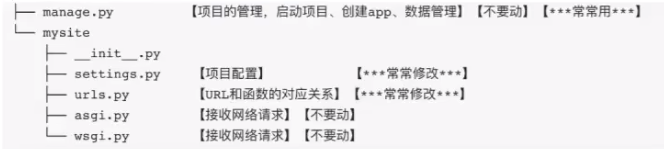
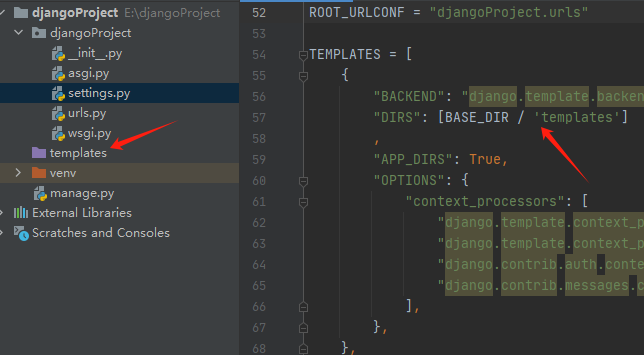
6.项目创建成功的准备工作
- 新建项目删除templates文件夹,并且修改setting这里的设置为[]
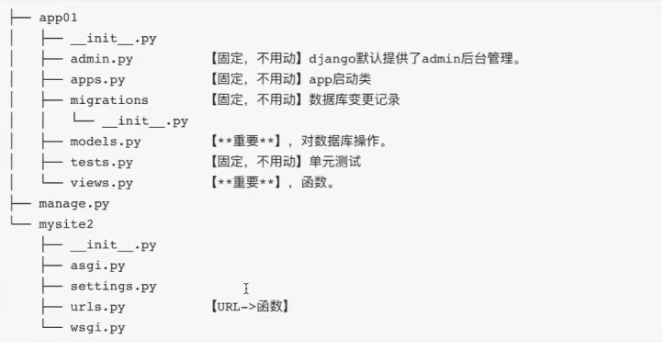
7.创建一个空的APP
 # 创建一个叫app的APP,下图中创建的是叫app01,不重要
 py manage.py startapp app
8.去settings注册这个app
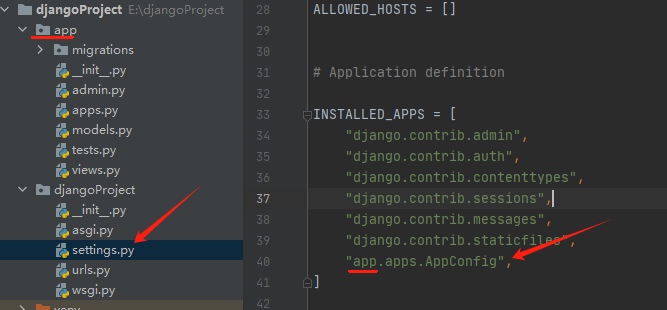
9.启动django命令
py manage.py runserver 8000
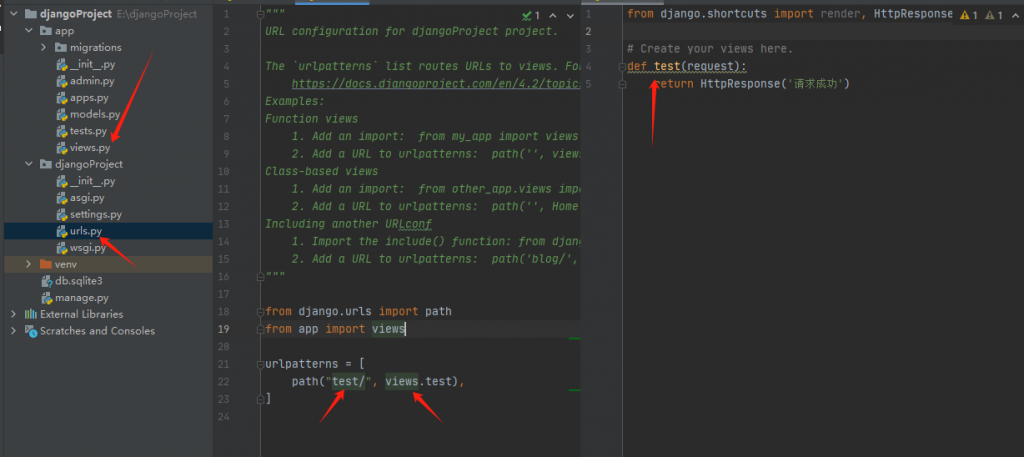
10.编写一个普通的请求
css3美化滚动条样式
/定义滚动条高宽及背景 高宽分别对应横竖滚动条的尺寸/
::-webkit-scrollbar{
width: 7px;
height: 7px;
background-color: #F5F5F5;
}
/定义滚动条轨道 内阴影+圆角/
::-webkit-scrollbar-track {
box-shadow: inset 0 0 6px rgba(0, 0, 0, 0.3);
-webkit-box-shadow: inset 0 0 6px rgba(0, 0, 0, 0.3);
border-radius: 10px;
background-color: #F5F5F5;
}
/定义滑块 内阴影+圆角/
::-webkit-scrollbar-thumb{
border-radius: 10px;
box-shadow: inset 0 0 6px rgba(0, 0, 0, .1);
-webkit-box-shadow: inset 0 0 6px rgba(0, 0, 0, .1);
background-color: #c8c8c8;
}
thinkphp安装jwt
composer require firebase/php-jwt
node.js安装教程
一、使用之前,我们先来掌握3个东西是用来干什么的。
npm: Nodejs下的包管理器。
webpack: 它主要的用途是通过CommonJS的语法把所有浏览器端需要发布的静态资源做相应的准备,比如资源的合并和打包。
vue-cli: 用户生成Vue工程模板。(帮你快速开始一个vue的项目,也就是给你一套vue的结构,包含基础的依赖库,只需要 npm install就可以安装)
开始:
https://nodejs.org/en/
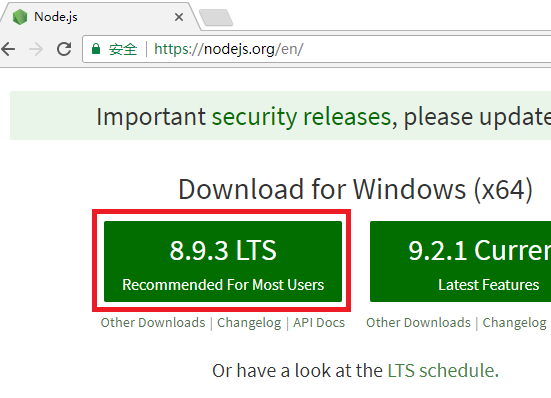
如图,下载8.9.3 LTS (推荐给绝大部分用户使用)
下载安装,可以使用默认路径,本例子中自行修改为d:\nodejs
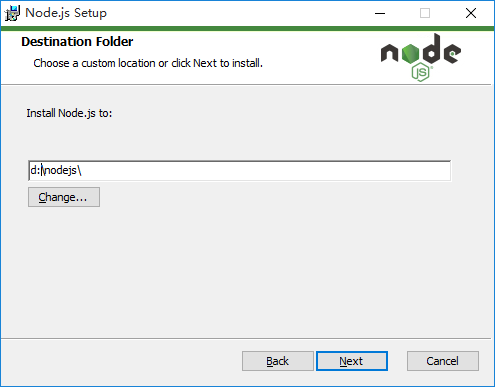
一路点Next,点Finish完成
打开CMD,检查是否正常
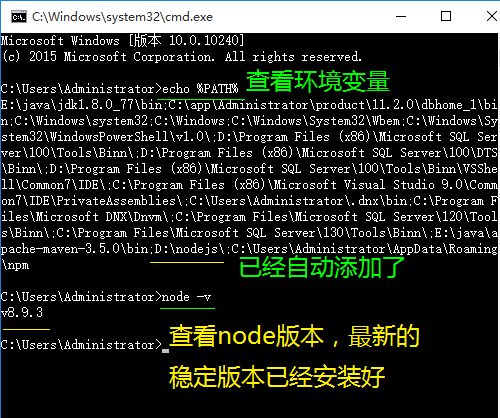
再看看另外2个目录,npm的本地仓库跑在系统盘c盘的用户目录了(没见到npm-cache是因为没有用过,一使用缓存目录就生成了),我们试图把这2个目录移动回到D:\nodejs
先如下图建立2个目录

然后运行以下2条命令
npm config set prefix "D:\nodejs\node_global"
npm config set cache "D:\nodejs\node_cache"
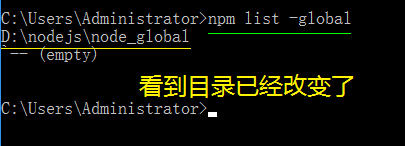
输入 npm list -global 可以看到目录已经改变了
输入命令npm config set registry=http://registry.npm.taobao.org 配置镜像站
检查一下镜像站行不行命令 npm config get registry
Npm info vue 看看能否获得vue的信息
注意,此时,默认的模块D:\nodejs\node_modules 目录
将会改变为D:\nodejs\node_global\node_modules 目录,
如果直接运行npm install等命令会报错的。
我们需要做1件事情:
1、增加环境变量NODE_PATH 内容是:D:\nodejs\node_global\node_modules
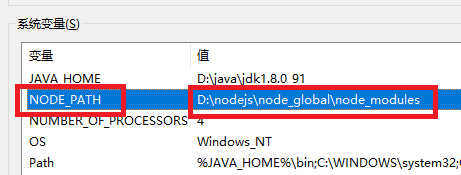
(注意,一下操作需要重新打开CMD让上面的环境变量生效)
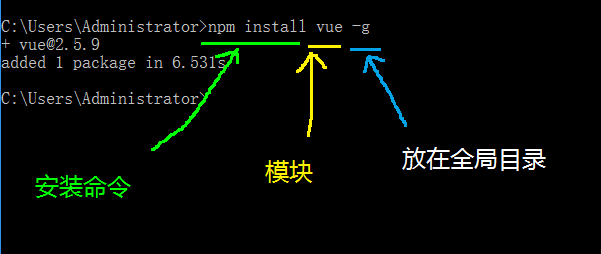
一、测试NPM安装vue.js
命令:npm install vue -g
这里的-g是指安装到global全局目录去
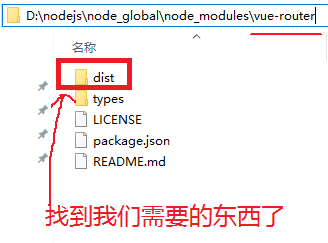
二、测试NPM安装vue-router
命令:npm install vue-router -g
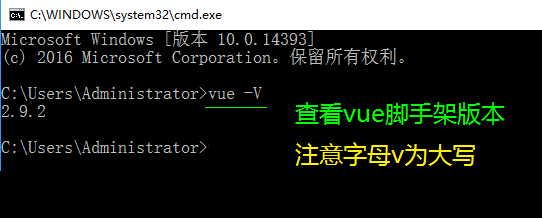
运行npm install vue-cli -g安装vue脚手架
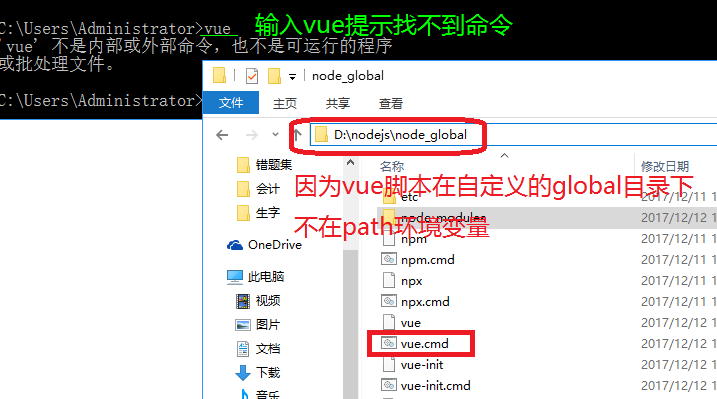
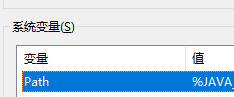
编辑环境编辑path
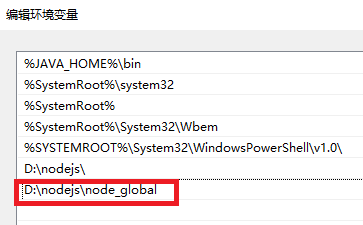
对path环境变量添加D:\nodejs\node_global
win10以下版本的,横向显示PATH的,注意添加到最后时,不要有分号【;】
最近研究的东西
1.uni-app APP的一键登录 https://uniapp.dcloud.io/univerify?id=%e6%a6%82%e8%bf%b0
uni-app制作微信小程序获取openid和用户头像昵称等登录信息
// 获取昵称、头像、性别、城市等个人信息
// 每次通过该接口获取用户个人信息均需用户确认
uni.getUserProfile({
  desc: '获取个人信息用于测试',
  success: function (infoRes) {
	console.log('用户昵称为:' + infoRes.userInfo.nickName);
	console.log('用户昵称为:' + infoRes.userInfo.avatarUrl);
  }
});

// 获取微信code 通过code传入后端获取openid
uni.login({
  provider: 'weixin',
  success: function (loginRes) {
	console.log(loginRes.code);
  }
});